


It’s no secret that I love skulls. At Christmas, I have a tabletop tree that is decorated only in skull-themed items.
I have skull coffee spoons.
Yes, I am that person.
So you can imagine my excitement when I rounded a corner at Michaels a few weeks back and there was an end display rack with only Halloween art and scrapbook items on it.
I know it was technically approaching that time of year, but I kinda felt as though those things had been placed there just for me. Most places don’t really carry things like that unless it’s close to Halloween, I guess. (I know, I’m constantly looking!)
Check out what supplies they have now: Michael’s (not affiliated, just a helpful link)
My haul for that day included a pad of skull themed scrapbook paper, a pad of skeleton tarot inspired cardstock, a pack of glitter, rolls of washi stickers (ravens, skulls, headstones, etc), and some graveyard/skeleton themed clear stamps and stickers.


I thought it would be fun to make a painting using as many of the supplies as I could.
As a bonus, while I was in Walmart I just happened to be in the fabric/craft section because my 9th grader needed an emergency spirit week costume for the next day (yeah, because nobody knew spirit week was coming up – said with heavy sarcasm).
In the bead and necklace section, a large jeweled skull pendant caught my attention – even more because it was on clearance – and the end shelves had pre-rolled samples of Halloween fabric for a dollar. There was a perfect black and white skull fabric. I grabbed both the fabric and the pendant, thinking I could add these to my Halloween painting idea.
Getting Ready to Create
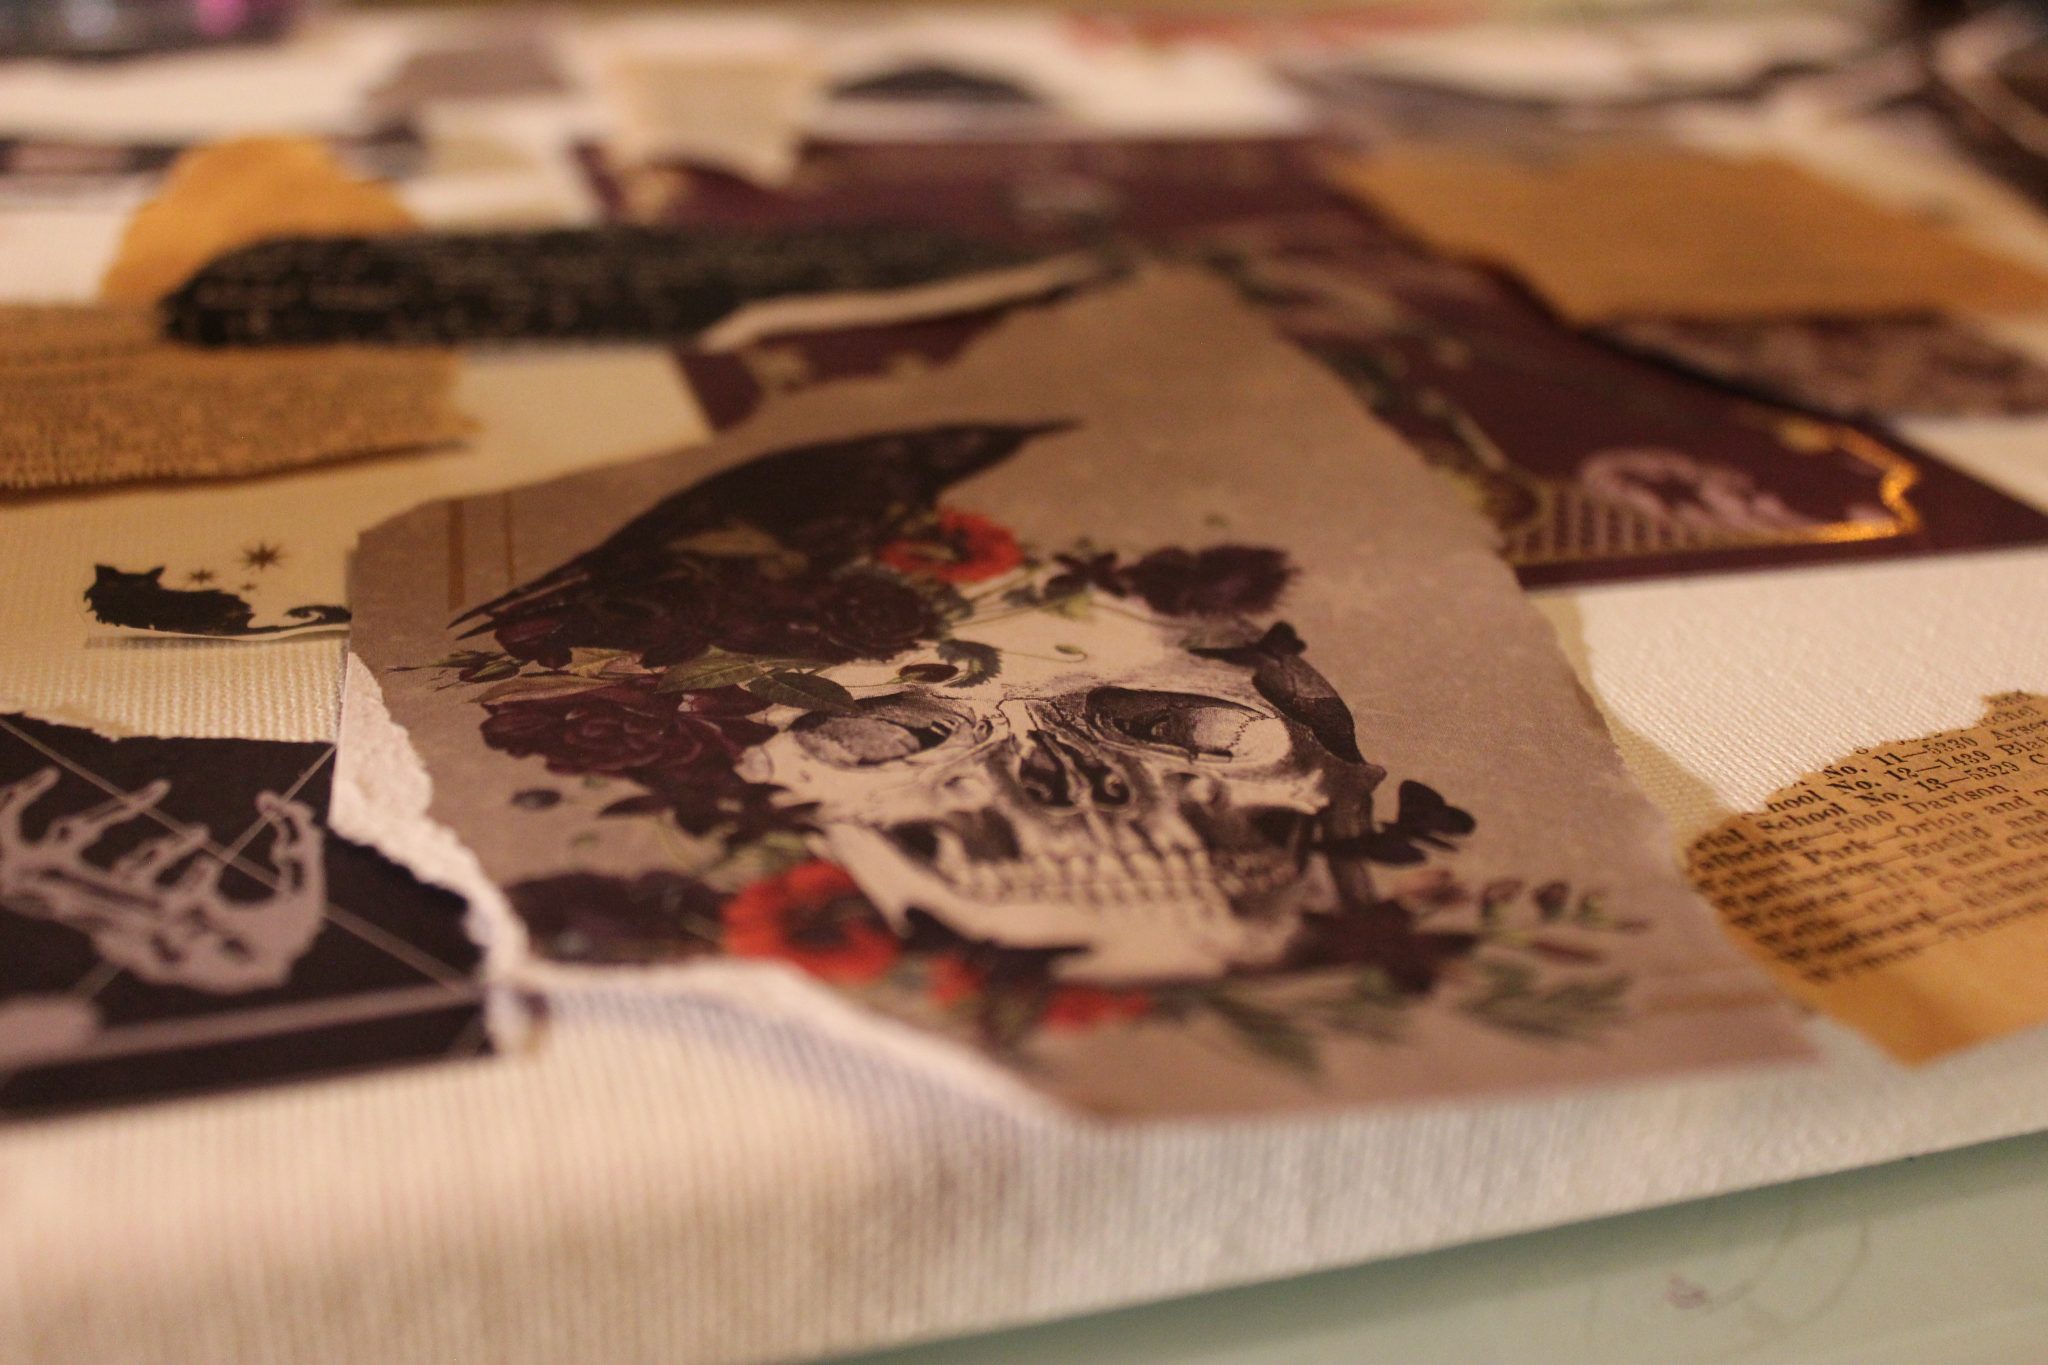
I’ve developed a process for most of my paintings that gets me into the right headspace for creating. I like to choose my canvas – in this case a smaller 9 by 12 stretched canvas – first. Then I sit at my art desk and pull out the supplies I think I’ll use for a particular painting. Before I even touch anything to my canvas, I like to have my papers, watercolor crayons, inks, 3D items, glitter, beads, stencils and any other items laid out and ready to go.
I do this because it helps me get a theme going in my head, and also because when I get started on my canvas, I don’t have to waste time digging for supplies and needed items. I also get out my Mod Podge, Heavy Gel Medium, a plastic card (like a gift card), gesso, water and brushes.
Oh, and also music! I don’t like to work without music, so I usually have Pandora or YouTube going before I start. If you would like to check out some music I use when I create, you can go to My “Creating Art” Song Playlist (15 Songs!) where the videos are linked in the post, or you can click on the YouTube playlist to listen to all the songs.
For this painting, I was a little ahead of myself because I had all the Halloween supplies to start with. So I got those together and tore a small pile of paper to use. I did some of the skull and tarot papers plus music, dictionary, and printed word papers.
Making a Halloween Mixed Media Painting
To start this painting, I took the skull fabric I had purchased and cut out a large and small skull. I treat fabric pretty much the same as I would paper. I glue it down with Mod Podge since it will pull the fabric tight with no wrinkles. Once I had the fabric on, I glued down my paper pieces, applying Mod Podge with a brush and then smoothing it out with my plastic card as a scraper.

I scribbled watercolor crayons in black, olive green, red, dark blue, orange and purple all over the canvas, and then used a brush and water to “activate” the crayon and turn it to watercolor. I left some scribble marks, though, because I like the look of them. After that was dry, I applied some gesso over some areas of the crayon and paper. I like using gesso over the watercolor crayons sometimes because it gives a dreamy, grungy look.

After this, I had a little fun with a few supplies I don’t use too much. I glued down a few pieces of textured ribbon I have. One is black and the other is gold. I had some glitter medium that I applied in a few areas over those ribbon pieces and also glued down a few of the washi stickers I had picked up: a raven and two spiderwebs.
Ink is a must for my mixed media pieces. For this one, I dropped black ink in little areas all over. I sprayed with water and let the ink spread out and dry. Then I used some of the stamps: a spiderweb, a spider and a “poison” bottle. I ended up using a white ink pad with the spiderweb in the upper left corner, but for the other two I just brushed over them with black acrylic paint and stamped them down.

After I was fairly certain I had my inks and stamps down and dry, I decided to add a few stenciled areas, too. I just took my stencils and paint (gold for a tree stencil behind the lower skull and black for the other stencils) and used a small wedge makeup sponge to press the paint.
Then one of my favorite parts of making a mixed media painting – it was time to glue down my skull pendant and other 3D pieces. I spread Heavy Gel medium just off center for the big skull area, and then at the lower left and a little along the right edge of the painting. Then I got beads, metal pieces, jewelry, etc. and stuck them into the gel. Finally, while the gel was still wet, I sprinkled the Halloween glitter over the gel areas. I also decided to use some of the silver star glitter I had, and made a small area of that at the top right of the painting, and added some dark blue glitter in with it.

I had to let the gel dry for quite a while. I usually leave it for several hours or overnight. Some areas of the gel are really thick and takes a while to dry, so I don’t like to try to mess with it until I’m sure its set. Then I take a paintbrush and brush off all the excess glitter onto a paper towel. I like to collect that excess in a container to use at another time so I’m not wasting bunches of glitter.
Once all the glitter is brushed away, I like to take my painting outside and tap it against the edge of my porch as this usually gets rid of the last bits of glitter that may be hanging on.
As a final step, I took some black acrylic paint and painted the sides of the canvas. I will be framing this painting, and I don’t want the different colors at the edges of the painting to not look uniform when the frame is on. It tends to look a little distracting and not professional. I use acrylic for this because it has good coverage and dries really fast.

If you like art videos, I also made a time lapse (speed) painting of the creation of this painting. As an added bonus, you get to see my new puppy in the intro!

So that’s it – a mixed media abstract painting using Halloween art supplies from start to finish! I hope you enjoyed seeing the creation process of this painting. I love Halloween and all the fun decorations and supplies you see around this time of year. Even though I am way past kid age, I still celebrate: we take our kids trick or treating and I dress up in costume for work. I’m still not sure what I’ll be this year, though. Do you still dress up? What will your costume be this year? Let me know in the comments!
- Art That Heals: The Mental Magic of Mixed Media - August 20, 2024
- The Fundamentals of Mixed Media Art: How to Create Art That Inspires - August 14, 2024
- From Chaos to Creation: 3 Experimental Mixed Media Painting Techniques to Try - June 24, 2024