

Saturday, November 16, 2019 marked my participation in my first big community art show and let me tell you, it was a whirlwind. (It’s why I haven’t been posting on here as frequently). I was so busy getting everything ready to show!
Now that it’s done with, I thought it would be interesting/helpful to go through all I did to get ready for this show in case any of you are getting ready or will be getting ready for your own shows.
I know I had questions. So many questions!
But I tried to be as prepared as I possibly could and I feel like that was the most helpful thing I could have done because when the big day came I was ready to go.
Getting Started
I first learned about this show through a social media post. I think it was on Instagram. It gave the date of the show and at the bottom it said artists who were interested in participating could go to the website to fill out an application.
The event is the Fort Smith Arts Walk, and even though I remembered hearing that name before, I didn’t know much about it. I went to their website to educate myself a little more. It was scheduled for November 16 and it was a multi-venued art show featuring dozens of local and semi local artists showing their work while people from the community could travel from location to location either on foot or by bus. There would be live painting and mural painting, food trucks, live music and a scavenger hunt with art giveaways from participating artists.
Dare I? I wondered.
Just filling out the form actually made me really nervous. I had never done anything like this before and questions swirled in my head. Will I have enough paintings? Will they pick me? What about pricing? Will there be a lot of people there? Is this art show going to be worth my time? How was I going to get ready for this?
At the time I didn’t know any of the answers but I bit the bullet and filled everything out, then winced and hit the send button.
Waiting . . .
Then I waited. I received an email asking me to send photos of my artwork. I had plenty of those so I replied with about 8 photos of some of my paintings. They replied that the photos were received and then . . . waiting again.
It was about a week before I heard back. I was wondering if I had even gotten in. But then an email came that started out with Congratulations! and I knew the news was good.
More Good News!
But wait, what was this?
You have been selected to be one of our Featured Artists. Your artwork will be displayed in our Main Hall venue.
I was floored. What did that mean? I went to the website and saw a section on Featured Artists. For each previous Arts Walk, the group in charge picked 4-5 featured artists. These artists were in the main location and were featured on the website and in social media promotions. As part of being a Featured Artist, I also got my first ever head shot done.

I have been doing this for years now but have only recently reached a point where I feel like I have enough “showable” paintings to participate in any large scale showings. Not to mention being a Featured Artist. I was a little dazed and felt like I wanted to pinch myself. My thoughts ran along the lines of Really? Me??
Now I knew I would have to step up my preparation.
Choosing Paintings & Getting Them Ready
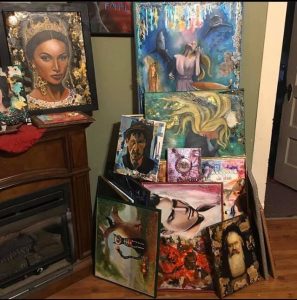
The first thing I did was go through my painting storage area and pull out all the paintings I could potentially show in this art show so I knew what I was working with. I was actually surprised to discover I had nearly 30 paintings that were ready or almost ready.
I went through each painting and made a list of the painting title, size, price, and anything it needed in order to be ready. Most needed a final clear coat, a frame, and hook and wire on the back for hanging. Some I hadn’t signed yet. Even though I kept them stored out of the way under blankets or a cover, most of them also needed a good dusting, believe it or not!

Dusting
To dust off my paintings (because the majority have heavy mixed media texture, 3D objects and glitter, I had to be pretty careful. To the rescue: a makeup brush! I have a big, soft, fluffy makeup brush that was prefect for removing any dust, lint, pet hair, etc. that had settled on the paintings.
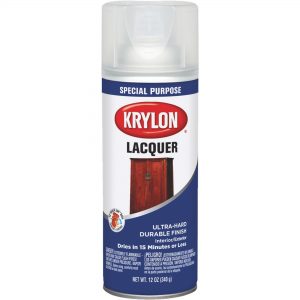
Protective Coat
I went to the store and bought spray lacquer. It gives a clear glossy or matte protective coating on the painting. I chose glossy. I like the spray lacquer because it dries fast and the final texture is glassy, not sticky.

Framing
The bulk of my time getting ready was spent on framing. Woodworking is not a skill I possess, so this too a lot of time, trial and error, and help from my fiancé (who has a lot more experience working with power tools).
Tools: We had a cut saw and a drill already, and I ended up purchasing a nailer and compressor for nailing the wood pieces to the painting.
Other items: I went to the home improvement store and bought decorative wood molding pieces, spray paints in various colors and spray polyurethane.
I took all my wood pieces outside and sprayed them either black, red, green, silver or gold. I tried to pick the color and frame styles that complemented each individual painting. After the color coat dried, I sprayed all the pieces with the clear polyurethane. Then it was time to actually cut the frames.
I had to learn as I went . . .
My fiancé was teaching me how to do the frames as we went along. I needed my wood pieces cut at a 45 degree angle to make the corners look nice, so I had to learn how to measure, cut, test fit and adjust for each piece. We got a pretty good rhythm going after the first few paintings and I ended up building frames for about 12-15 paintings. Others I left like I have done in the past: just painting the outside of the canvas so it looked finished.
Hanging
To hang paintings I’ve been taught to do “hook and wire” so I made sure every painting I was bringing had the hook and wire done. This just means setting two eye hooks into the canvas stretcher boards on the back of the painting at an even measurement vertically, then sliding the wire into the eyehooks and twisting the ends around each other to make a continuous wire loop. This makes it easy to hang and level the painting no matter where it is.
Odds and Ends
Other things I did to prepare for the art show:
- Made sure all paintings were signed and dated.
- Touched up any area of the frames where the wood had split or peeled during the cutting process.
- Made display tags using Canva with the painting’s name, size, medium and price.
- Made an artist’s Bio, a price list, and a social media info sheet.
- Got the bright idea at (almost) the last minute to have some stickers made. I thought it would be fun to hand out stickers of a few paintings with my name and email address on them as a fun “marketing” piece. I ordered them from Vista Print and they were able to create, print and ship the stickers in about 3 days time. Pretty impressive! The stickers had a glossy finish and looked great. I would definitely do this again, probably ordering more. I handed them out for free and I’m not sure if I would charge in the future. The idea was simply to get my name/paintings out there. I ended up giving away all the stickers I had printed!
- Made an info card. Again in Canva, I made a postcard sized handout with some of my paintings on the front and all of my contact information and social media links on the back. I printed out the cards on cardstock and cut them myself. I handed out all the cards I brought to the Arts Walk.
Setting Up at the Art Show
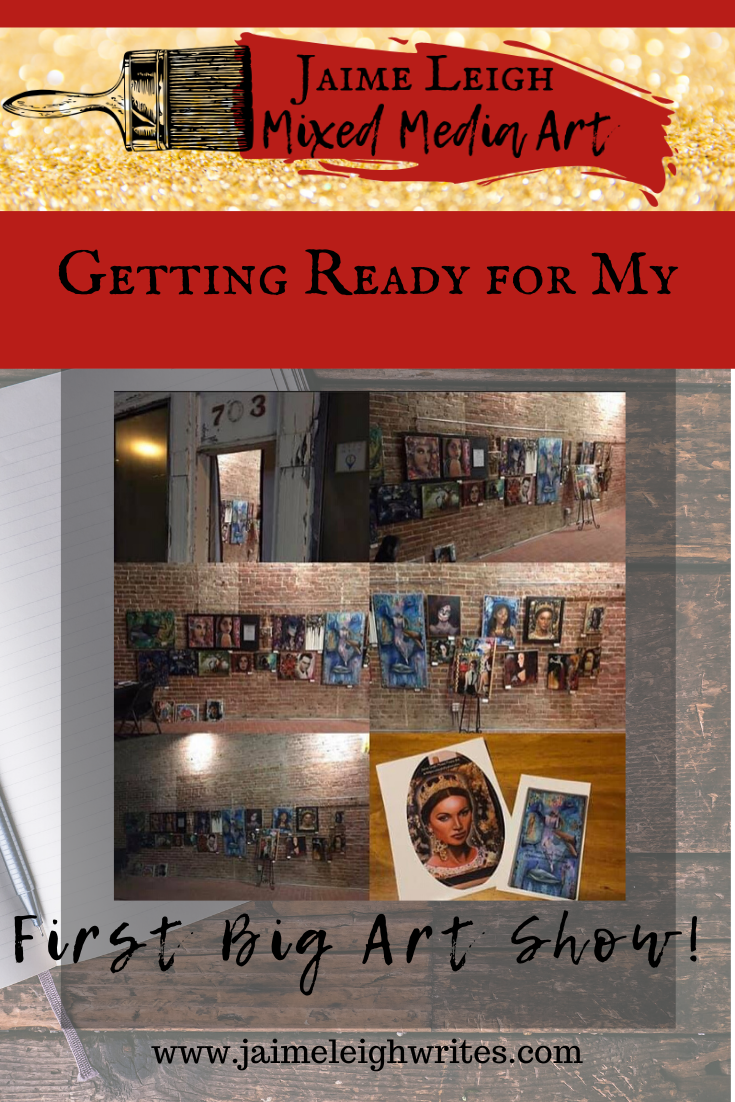
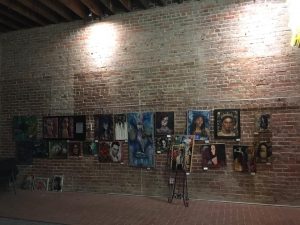
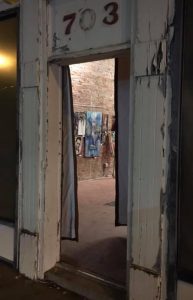
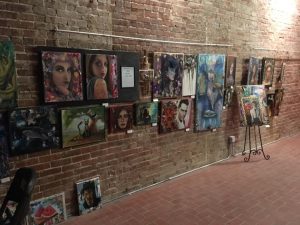
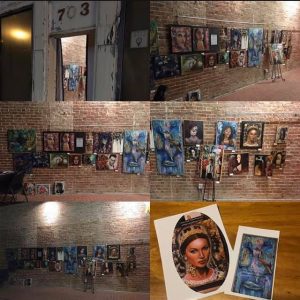
The venue where I was located was actually really cool. It was a long narrow open room with 20+ foot ceilings and exposed brick walls. My section was right where people walked in the door. Along the brick were metal rods hanging horizontally, suspended by wire. These rods has chains hanging from them for attaching paintings to. The night before the art show, I carefully loaded all my paintings into my car (a hatchback that you can fold the seats down in) and wrapped them all well with blankets so they wouldn’t rub and pull the mixed media off.
I brought my fiancé with me to help hang, and also pliers, extra wire, tape, and my display tags. I also had a folding camp table, tablecloth, business cards, a decorative easel and a business card holder. We hung all the paintings using the chains, wire, and some extra chain on a roll they had. I set up the table next to my displayed paintings, and was able to go home feeling completely prepared, which never happens, ever!
The Event
The day of the Arts Walk, I literally just had to show up and be there. We were required to be by our paintings for the whole event, so I showed up at 10 (an hour early) in case anything needed to be done last minute, but really everything was set. I was surprised that people started showing up at 10:30 for the art show and that there was a steady stream of people the entire day from 10:30 until 8pm! My location was right next to artist Kat Wilson’s #selfiethrone, which was the show’s main attraction.

I have actually never seen an art show with that many in attendance. Even the organizers were shocked and pleased, because they had planned for maybe 700 people to attend and the actual amount far exceeded that!
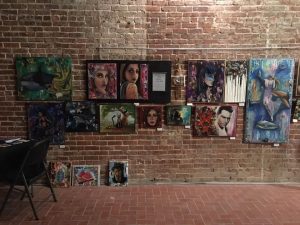
The other amazing part was how many of those people were actually interested in looking at art. They studied my paintings, talked about them to each other, and asked me lots of questions and gave me tons of feedback, all of it positive. I heard how they felt looking at my paintings, what the paintings made them think about or see, and how they felt about the technique, style and subjects of the paintings!
My “Before” and “After” Was a Hit
My most discussed and commented on painting was a large wood panel that actually contained two canvas paintings of the same size on it. One was a portrait of a female subject I had completed in May 2018 using acrylics, and the other was the same exact subject completed a year later using oils. The name of it was “Evolution of an Artist” and I had attached a written explanation that this painting combo was to show the difference between one year ago when I was trying to learn everything myself, and the difference that came from taking a year of painting lessons from a professional artist.
In the End, It Was a Success!
I gave away all my stickers, all my info cards, a bunch of business cards, and sold two large paintings. To be honest, I was never expecting to actually sell anything, I was more interested in having people see my work, so that felt like an amazing bonus!
It was exhausting and time consuming getting everything ready and then hanging paintings, being there the entire day and taking down the paintings at the end (which was 10 pm!), but it was all totally worth it.
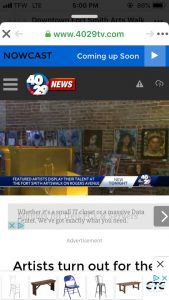
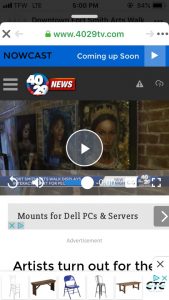
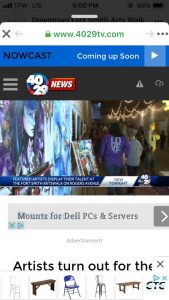
The local news station, 4029tv covered the art show, and I was excited to see that my paintings were the background for the segment!
The best thing I did was prepare everything before the art show. I saw some artists hurrying in at the last minute, looking flustered and having to set up while the event was starting. To be able to just focus on the people and their questions and comments, hand out my items, and (kind of) relax was priceless!
Want to see a quick video tour of my space at the Arts Walk? Head on over to my Instagram and click on the highlighted Instagram Story “Arts Walk.” (Also, follow me on Instagram if you’re not already!) Jaime’s Instagram
Interested in how I create the art that was on display? Check out Mixed Media Art Tutorial: My Art Process Step-By-Step
And as always . . .

- Art That Heals: The Mental Magic of Mixed Media - August 20, 2024
- The Fundamentals of Mixed Media Art: How to Create Art That Inspires - August 14, 2024
- From Chaos to Creation: 3 Experimental Mixed Media Painting Techniques to Try - June 24, 2024