


In today’s post, I will give you a mixed media art tutorial covering my art creation process step by step!
Materials I use in this tutorial*:
- 9×12 Canvas Panel
- White gesso
- Workable Fixative Spray
- Pink and teal mini beads
- Glitters: I will be using teal, gold, lavender, pink and black
- Ink and ink spray: I will use both drip ink and spray ink in purple, white, pink, and teal
- Torn scrapbook papers
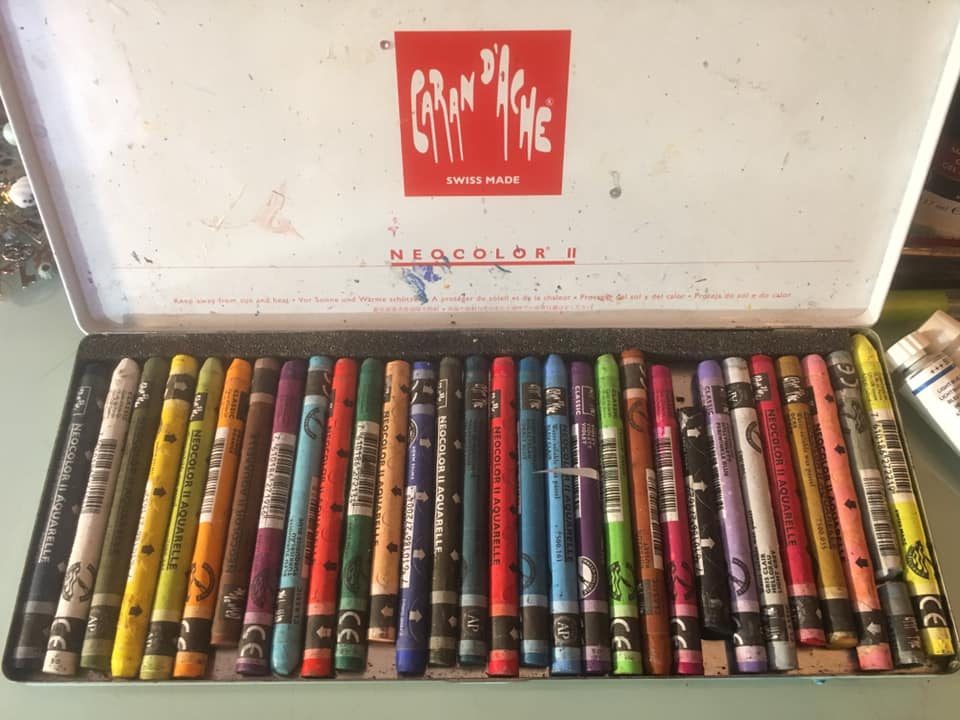
- Caran D’ache Watercolor crayons (or watercolors, or acrylic paint – your choice!)
- 3D items: I’m using gears, jewelry, beads, and other found objects
- Gouache
- Black oil paint
- Paintbrushes and water (to thin the gouache)
- Mod Podge
- Liquitex Super Heavy Gel Medium
- Old gift card (to spread the Mod Podge over the scrapbook papers to smooth them out)
- Spray varnish or liquid varnish (optional)
*Please know you do not need all the items listed here, and you do not need to run out and purchase anything! Use what you have, and have fun! Art does not have to be expensive. Even if you have the basic supplies, you can have fun and be creative! Ok, rant over 🙂
Supplies for this tutorial:

More supplies for this painting:

Before You Start!
Pre-Step: Before you start, you have several options for the “subject” of your painting. (For example, my subject will be a horse, shown in the image below).
My drawing on my canvas panel:

Your subject can be a pet or animal, a person, an object or you can even have no subject – keep it completely abstract. If you choose to draw, you can draw or paint freehand or use a reference photo. You can even collage your subject – it’s all up to you!
Depending on your preference, there’s actually two ways to approach the subject of your painting.
Subject Option #1: Draw your subject first.
I usually pick this option, and this is what I did for this tutorial. Starting with a blank, white canvas, I drew my subject (a horse) first, using pencil. I do this because I am kind of a perfectionist (okay, fine, I’m a really big perfectionist!) I feel more comfortable having my drawing laid out so I know where and how to lay out my background. You are completely fine if you don’t want to do it this way . . . that’s why I will give you Option 2!
Subject Option #2: Draw (or paint) your subject on top of your background.
You can also cover your whole canvas with your background (follow the tutorial steps 1-9) and then add your subject on top of that if you choose – just know this might take a little extra work because you will be trying to draw or paint over a more textured surface.
This option may work well for you if you are more of an intuitive painter – once your background is complete, you can use the texture/color etc. to let your subject emerge.

Mixed Media Art Tutorial: Let’s Begin!
Step 1: Glue torn scrapbook papers to canvas panel. To start, pick out the papers you want to glue to your painting. Tear (or cut with scissors).

Once I tear my papers, I lay them out on my canvas. There is no rhyme or reason to this part of the process – I just go with what looks good to me. Much of it will be covered up, but it’s the little bits and pieces showing through the layers that give this type of technique its uniqueness. Don’t think too hard about it and just enjoy the process. It’s pretty Zen!

Next, apply the Mod Podge glue with a brush. Make sure to take up the paper, apply glue under it (directly on the canvas), and then apply more glue on top of the paper. This makes sure there will be no bubbles or air gaps and that all edges will stick down.

If you want a smooth glue look, “Scrape” the glue while it’s still wet with an old plastic card, taking care not to tear the paper (unless you like the torn look, then by all means, tear away!)

Step 2: Use a watercolor crayon (or other paint you have handy!) over papers.
Once my scrap paper pieces are glued down and the glue is dry, I like to go over parts of the background with scribbled watercolor crayon, which I then activate with water so it all flows and blends together.
You can do this directly over the paper/Mod Podge, or you can paint or scrape a thin layer of gesso over the background and let it dry before you add your watercolor crayon. I’ve done both techniques on different paintings – it depends on what look you want to achieve!
For this piece, I decided to use gesso, which I brushed on diluted with water in certain areas. I left other areas gesso-free.
Here I am brushing on thin white gesso:

I use Caran D’ache Watercolor Crayons. I had to order these online – they aren’t available in my local art store. However, I do believe there are Windsor Newton and store brand watercolor crayons available in-store, so if you’d like to try them out, those options are fairly inexpensive and available.
If you don’t have watercolor crayons, you can also just use watercolors, or even acrylic paint. Basic watercolors like the set below will work fine for this tutorial:

In the photo below, you can see my artwork with the pencils scribbled on. This is a very easy and loose step. Just pick colors that you love and will blend well together! I used teal, pink, purple/lavender, black, and white.

After scribbling the watercolor crayon, I then use water and a brush to “activate” the watercolors and blend them. If you are using just watercolor, you can just apply the colors to the areas you choose. Acrylic paint will work also, and just needs to be thinned with water. If you do use acrylics, remember they dry faster – so work quickly!

Step 3: Do a gesso layer if needed.
I chose to put some gesso over my watercolor crayon/scrapbook paper layer, and you can too! Here I scraped some gesso over the watercolor crayon in several spots. I made some gesso thick and textured, and smoothed other areas out with my plastic card. This gives the layer a hazy, dreamy look. If you like this look, then the gesso layer is for you! If you don’t want to do this, feel free to skip ahead to Step 5.

Step 4: Repeat 2 & 3 if you want to.
You can do the gesso/watercolor crayon (or watercolor, or acrylic) layers as many times as you like. I usually do mine once, but you don’t have to stick to that.
Step 5: Once your layers of gesso, watercolor and scrapbook papers are dry, it’s time to apply ink!
Ink is unpredictable! But don’t be nervous, I give some hints below for how to make your ink behave a little bit.
In step 5, you can apply bottled ink, spray ink, etc. to the background. For ink with a dropper, simply drop small amounts around your canvas. Spray inks can be sprayed directly onto your background. You can also pour from an ink bottle, or brush it on with a brush.
Helpful Hint: Cover your subject with a clean piece of paper or paper towel if you use spray ink. This way, overspray won’t accidently get on your drawing. You can even tape the paper down with masking tape if you’re worried about the ink getting under the protective paper.
Here, I apply purple ink with a dropper:

Now, before your ink dries comes the FUN part! This is when your ink will do things all by itself. To get your ink to spread out and run together, all you need is a spray bottle of water.
I spray all my ink with a spray bottle of water. This allows the ink to run and mix and creates a nice effect. Just be sure to watch where the ink runs! It may run off the canvas (which is why I lay my painting on a piece of newsprint paper).
Or it may run toward your drawing. If it does this, you can tilt your painting to get it to run the other direction, or blot the edge with a paper towel to take up the excess ink.
Spray a small section at a time so you can catch any runaway ink, and then move on to another section. Below I have sprayed and used a dropper to apply my ink.

Now here’s what it looks like after I spray with water! See how cool it is when it flows around?

This ink layer may take a while to dry, depending on how much ink you’ve used! You can choose to let the art sit for a while (this is a good time for a break and a cup of coffee. Or a glass of wine!) You’re welcome! 😉 Or, move on to Step 6 while the ink dries. Just be careful to not touch the ink during Step 6 if it’s still drying.
Step 6: You can choose to start painting your subject now while the background dries, or you can wait until after Step 9.
If you use acrylic, gouache, or watercolor paint, you can work on your subject now if you want to. For oil paint, I would wait until after Step 9, since oil takes longer to dry. (If you do oil paint now and then try to add glitter or another material, it will stick to the oil paint and is very hard to remove!)
Since I am working in gouache, which dries quickly, I decide to start working on painting my horse while I wait for the inks to dry. You could also use a blow dryer or heat dryer to dry your inks, just know that the dryer will move the ink around some as it dries it.
Here I have painted the dark areas of my horse:

To paint the horse, I mixed violet and black gouache and thinned it with water.
Then I looked at my reference photo and only applied the color to the darkest parts of the painting. I left the highlight areas white. For the middle greys, I took a small wet brush and moved a little gouache into those areas. Once that first layer dried, I went back with some less diluted violet and black gouache to darken all the areas that are really black. Gouache dries fast, so once I was done applying my blacks, it was all pretty much dry.
Step 7: Choose your 3D elements. Attach them to the canvas using matte super heavy gel. Make sure your other layers are completely dry before starting this step!
Matte super heavy gel comes in a jar, so I’ve found that using a knife or palette knife to scoop it out and smear it on the surface works well. You can just use a plastic disposable knife, no need to be fancy.

Once my gel is on the surface, looking kind of like a blob, I take my 3D pieces and start smooshing them into the gel. I use the knife to move any gel around to where I need it. (For example, if I have a larger item, I will press more gel around it to better hold it in place). Since the gel dries clear, I don’t worry too much about “seeing” the gel.

Here is how it looks when I have my items in the gel.

Step 8: Attach something to mask the gel if you wish. Paint, glitter, yarn, fabric, or very thin paper are good options. I use glitter. I love the look I get when I have multi-colored glitter on different parts of my artwork. But you are not limited to glitter. You can get creative with other ways to cover the gel medium. Or – don’t cover it! It dries clear anyway. Below I sprinkle rose gold glitter on some gel:

Below is one area covered in glitter. Once I have applied all the gel, objects and glitter, I usually leave my artwork this way overnight, which gives the gel time to dry and let the glitter stick to it as it dries. Not all the glitter will stick. I brush all the excess glitter off with a soft brush. I have a large plastic Tupperware bowl that I collect all my “fall off” glitter in. This way, I am not wasting glitter, and I have something to use on my next painting!

Step 9: Let all the layers dry.
Step 10: Go back and finish working on painting your subject if you haven’t finished yet. If you decided to paint with oils, now is the time to start painting with oils!
I had already done my horse in gouache paint, but at the end I added white oil paint for most of the highlight areas. As you can see, I had some glitter stick to the black oil paint I had used earlier. Since I’m not mad at how it looks, I decided to leave it! (Even “mistakes” can sometimes work for you. Don’t ever be worried about making a mistake. Some mistakes actually work for your paintings, and others can be fixed).
Depending on your subject, this step may take a while. If you are very detailed/have a more complicated subject, you can spend extra time here making it look how you want it to.

After it’s completed: Once your subject is painted (or if you didn’t have a subject and kept it abstract), let your painting sit for a little bit to make sure all ink, gel medium and oil paint are dry. For most mediums, it will all be dry the same day. For oils, it can take a week or more.
Once your artwork is completely dry, you can put a coat of clear spray or liquid varnish if you’d like. This step is optional, but if you want to preserve the painting, bring out the colors, and make sure it doesn’t get damaged in the future, varnish will be a good option for you. Before you varnish, make sure you:
- Do it outside or in good ventilation
- Remove all dust particles or any other “contaminants” with a brush, tweezers, etc.
- Check to make sure glitter is not stuck in an odd area (if you used glitter).
- Follow the instructions on your varnish can or bottle.
Once your painting is sealed (if you chose to do that), you are all done!
I hope you enjoyed the complete process of creating a mixed media painting step by step as much as I did! If you have questions about any of the materials, steps, or techniques, please leave a comment below and I will be glad to offer my help. Also, I would love to see what you create! Show me in the comments, or share on Instagram to @dieselandink or Twitter @jaimelhebert.
For more mixed media art goodies, start here: Getting Started With Mixed Media Art: What Surface to Use?
- Art That Heals: The Mental Magic of Mixed Media - August 20, 2024
- The Fundamentals of Mixed Media Art: How to Create Art That Inspires - August 14, 2024
- From Chaos to Creation: 3 Experimental Mixed Media Painting Techniques to Try - June 24, 2024
Pingback: Radiant Child – Julie's thoughts